Projector Replacement Lamp: Illuminating Your Viewing Experience
In the ever-evolving landscape of home entertainment, projectors continue to be the focal point for those seeking a cinematic experience within the comforts of their homes. A crucial aspect of ensuring the longevity and optimal performance of your projector is the replacement of its lamp. In this comprehensive guide, we will explore the why, when, and how of projector lamp replacement bulbs, shedding light on the intricacies of this essential maintenance task.
Understanding the Significance of Projector Lamps
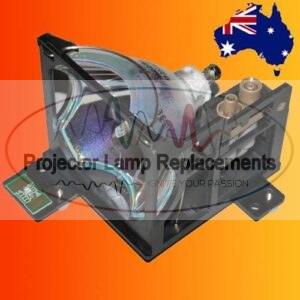
Projector lamps, often referred to as bulbs, are the lifeblood of your projector. They provide the necessary light source to bring your favourite movies, presentations, and visuals to life on the big screen. Over time, these lamps undergo wear and tear, affecting their brightness and overall performance. Regular replacement is paramount to maintain the vibrant and crisp image quality that you expect from your projector.
Signs Indicating the Need for Replacement
- Diminished Brightness: If you notice a gradual reduction in brightness, even with adjustments, it’s a clear signal that your lamp may be reaching the end of its life.
- Colour Inconsistencies: Fading colours or an unnatural tint in your projections can be indicative of a lamp that needs replacement.
- Flickering or Instability: Lamps nearing the end of their lifespan may exhibit flickering or instability, compromising the visual experience.
Projector Lamp Replacement bulb: A Step-by-Step Guide
- Check the Manufacturer’s Guidelines:
- Always refer to your projector’s manual for specific instructions regarding lamp replacement. Each projector model may have unique requirements and procedures.
- Gather Necessary Tools:
- Ensure you have the required tools ready, including a screwdriver for opening the casing and the replacement lamp itself.
- Power Off and Unplug:
- Prioritize safety by turning off the projector and unplugging it. Allow the projector to cool down before proceeding.
- Access the Lamp Compartment:
- Using the screwdriver, carefully open the projector casing to access the lamp compartment. Handle the casing with care to avoid damage.
- Remove the Old Lamp:
- Extract the old lamp, following the manufacturer’s instructions. Some projectors may require unscrewing a cover, while others may have a simple removal mechanism.
- Install the New Lamp:
- Handle the new lamp cautiously, avoiding direct skin contact. Follow the manual’s instructions for proper installation. Ensure the lamp is securely in place before closing the casing.
- Reset the Lamp Timer:
- Many projectors have a lamp timer that needs resetting after replacement. Refer to the manual for instructions on resetting the timer.
- Close the Casing:
- Securely close the projector casing, ensuring all screws are tightened. This step is vital for the safety of the lamp and the optimal functioning of the projector.
- Power On and Test:
- Plug in the projector, power it on, and test the new lamp. Verify brightness, color accuracy, and check for any signs of flickering. Successful testing ensures a seamless replacement.
Projector Lamp Replacement Services: Trusting the Experts
While the DIY approach is suitable for many, some users prefer the expertise of professionals when it comes to projector lamp replacement. At Projector Lamp Replacements, we take pride in offering over 20 years of experience in delivering quality projector lamps. Our team of experts ensures a seamless replacement process, coupled with the assurance of warranty and quality service.

Expert Tips for Maximizing Projector Lamp Lifespan
In addition to timely replacement, adopting certain practices can extend the lifespan of your projector lamp:
- Eco or Low-Brightness Mode:
- Utilize energy-saving modes available in most projectors. These modes not only conserve energy but also reduce strain on the lamp, extending its life.
- Regular Air Filter Maintenance:
- Dust accumulation can lead to overheating. Regularly clean the projector’s air filters to ensure proper ventilation and prevent potential damage to the lamp.
- Minimize On/Off Cycles:
- Avoid frequent on/off cycles, as they can put additional stress on the lamp. Minimizing unnecessary power cycles contributes to an extended lamp life.
- Optimal Ventilation:
- Ensure proper ventilation around the projector to prevent overheating. Adequate airflow is crucial for maintaining the lamp’s performance.
Projector Lamp Replacement Bulbs Conclusion
Projector lamp replacement is a pivotal aspect of maintaining an optimal viewing experience. Whether you choose the DIY approach or trust the expertise of professionals, the key is ensuring timely replacement for a projector that continues to deliver outstanding visuals. At Projector Lamp Replacements, we stand by our 20 years of experience, offering quality lamps and expert services. Follow the expert tips, and you’ll enjoy vibrant visuals on your big screen for years to come
Need more information or assistance with a projector lamp replacement?
Contact us on 08 7079 8647 or contact us via email and one of our staff members will get back to you as soon as possible.