Projector Bulb Replacement: A Comprehensive Guide for Optimal Home Theatre Experience

In the realm of home entertainment, projectors play a pivotal role in delivering immersive visuals. However, like any electronic device, projectors require periodic maintenance, and one of the critical aspects is replacing a projector bulb. In this guide, we will delve into the why, when, and how of replacing projector bulbs to ensure that your home theatre continues to dazzle with bright and vibrant images.

Understanding the Importance of Projector Bulbs.
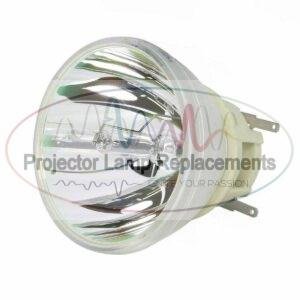
The projector bulb, also known as a lamp or light source, is the heart of your projector. It’s responsible for emitting the light necessary to create the images on the screen. Over time, projector bulbs tend to lose their brightness and colour accuracy, leading to a decline in overall image quality. This is why replacing a projector bulb is crucial for maintaining optimal performance.
Signs It’s Time for Replacement
1. Diminished Brightness: If you notice a gradual decrease in brightness or the images appear dim even with increased settings, it’s a clear sign that the bulb is aging.
2. Colour Distortion: Fading colours or unusual hues in the projected images indicate a deteriorating bulb.
3. Flickering or Instability: Bulbs nearing the end of their lifespan may exhibit flickering or instability, affecting the overall viewing experience.
Replacing a Projector Bulb : Step-by-Step Guide
1. Check the Projector Manual
Before embarking on the replacement process, consult your projector’s manual. It provides specific instructions for your model, including the type of bulb required and the steps involved in replacement.
2. Gather Necessary Tools
Ensure you have all the required tools handy. This typically includes a screwdriver (to open the projector casing), a replacement bulb, and a soft cloth to handle the new bulb.
3. Power Off and Unplug
Safety first! Turn off the projector and unplug it from the power source. Allow the device to cool down before proceeding.
4. Access the Bulb Compartment
Using the screwdriver, carefully open the projector casing to access the bulb compartment. Be gentle, and follow the manual’s instructions to avoid any damage.
5. Remove the Old Bulb
Once you have access to the bulb, carefully remove it. Some projectors have a bulb cover that needs to be unscrewed, while others may have a simple twist-and-pull mechanism.
6. Install the New Bulb
Handle the new bulb with care, avoiding direct contact with your skin. Follow the manual’s guidelines for proper installation. Ensure the bulb is securely in place before closing the casing.
7. Reset the Lamp Timer
Many projectors have a lamp timer that needs to be reset after bulb replacement. Refer to the manual for instructions on resetting the timer to zero.
8. Close the Casing
Securely close the projector casing, ensuring that all screws are tightened. This step is crucial for the safety of the bulb and the proper functioning of the projector.
9. Power On and Test
Plug in the projector, power it on, and test the new bulb. Check for brightness, colour accuracy, and any signs of flickering. If everything looks good, you’ve successfully replaced the projector bulb.
When replacing a projector bulb, Professional Projector Bulb Replacement Services are sometimes deemed the way to go.
While the DIY approach is feasible for many, some users prefer the expertise of professionals for projector bulb replacement. This is particularly true for high-end or complex projector models. Professional services not only ensure a seamless replacement but also come with the added benefit of warranty and quality assurance.

Expert Tips for Prolonging Projector Bulb Life
Apart from timely replacement, adopting certain practices can help extend the lifespan of your projector bulb:
1. Use Eco or Low-Brightness Mode
Most projectors come with energy-saving modes. Using these modes not only conserves energy but also reduces the strain on the bulb, prolonging its life.
2. Clean the Air Filters
Dust accumulation can lead to overheating, affecting the bulb’s performance. Regularly clean the projector’s air filters to ensure proper ventilation.
3. Avoid Frequent On/Off Cycles
Turning the projector on and off frequently puts additional stress on the bulb. Minimize unnecessary power cycles to extend the bulb’s life.
4. Maintain Proper Ventilation
Ensure that the projector has ample space for ventilation. Overheating is a common cause of bulb failure, so proper airflow is crucial.
Replacing a Projector Bulb Conclusion
Projector bulb replacement is a critical aspect of maintaining a top-notch home theatre experience. Whether you choose the DIY route or opt for professional services, regular replacement ensures that your projector continues to deliver stunning visuals. Follow these tips, and you’ll be on your way to enjoying bright and vibrant visuals for years to come.
Need more information or assistance with replacing a projector bulb?
Contact us on 08 7079 8647 or contact us via email and one of our staff members will get back to you as soon as possible.

